Setting Up Office Hours (for Instructors)
To set up office hours using the scheduler feature in Canvas, please follow these instructions.
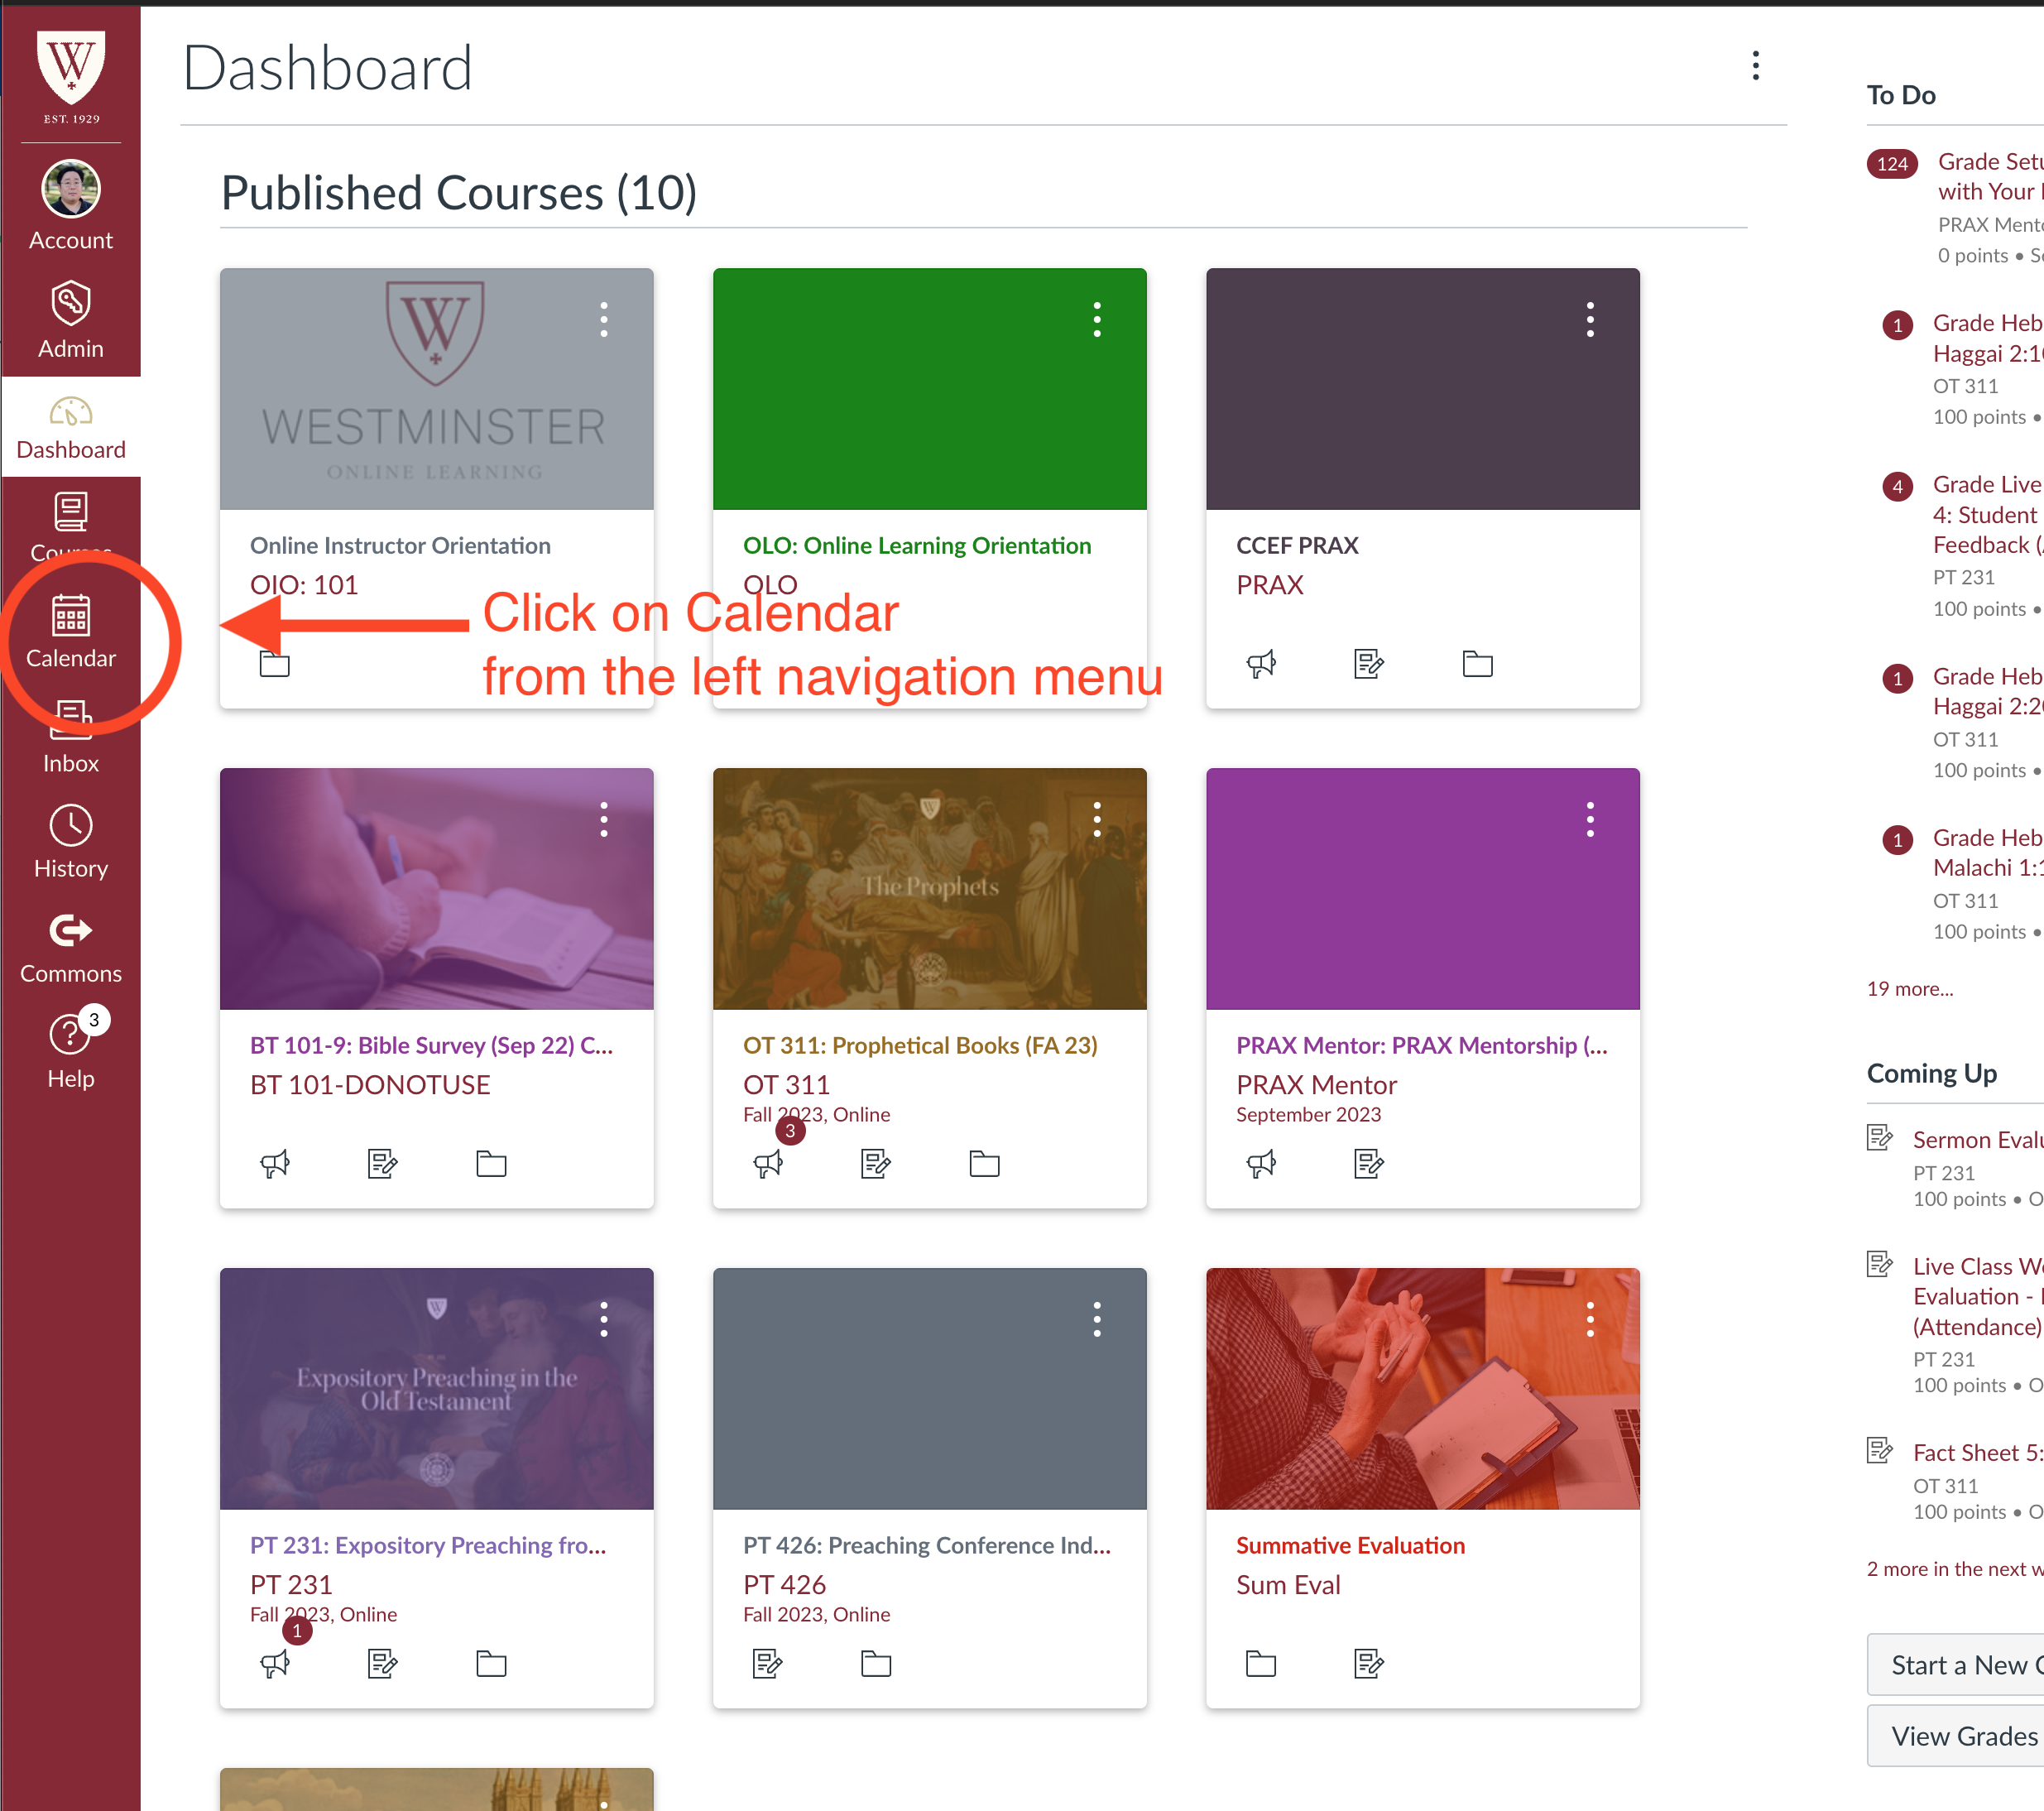
From your dashboard, click on "Calendar" in the main, left navigation menu.
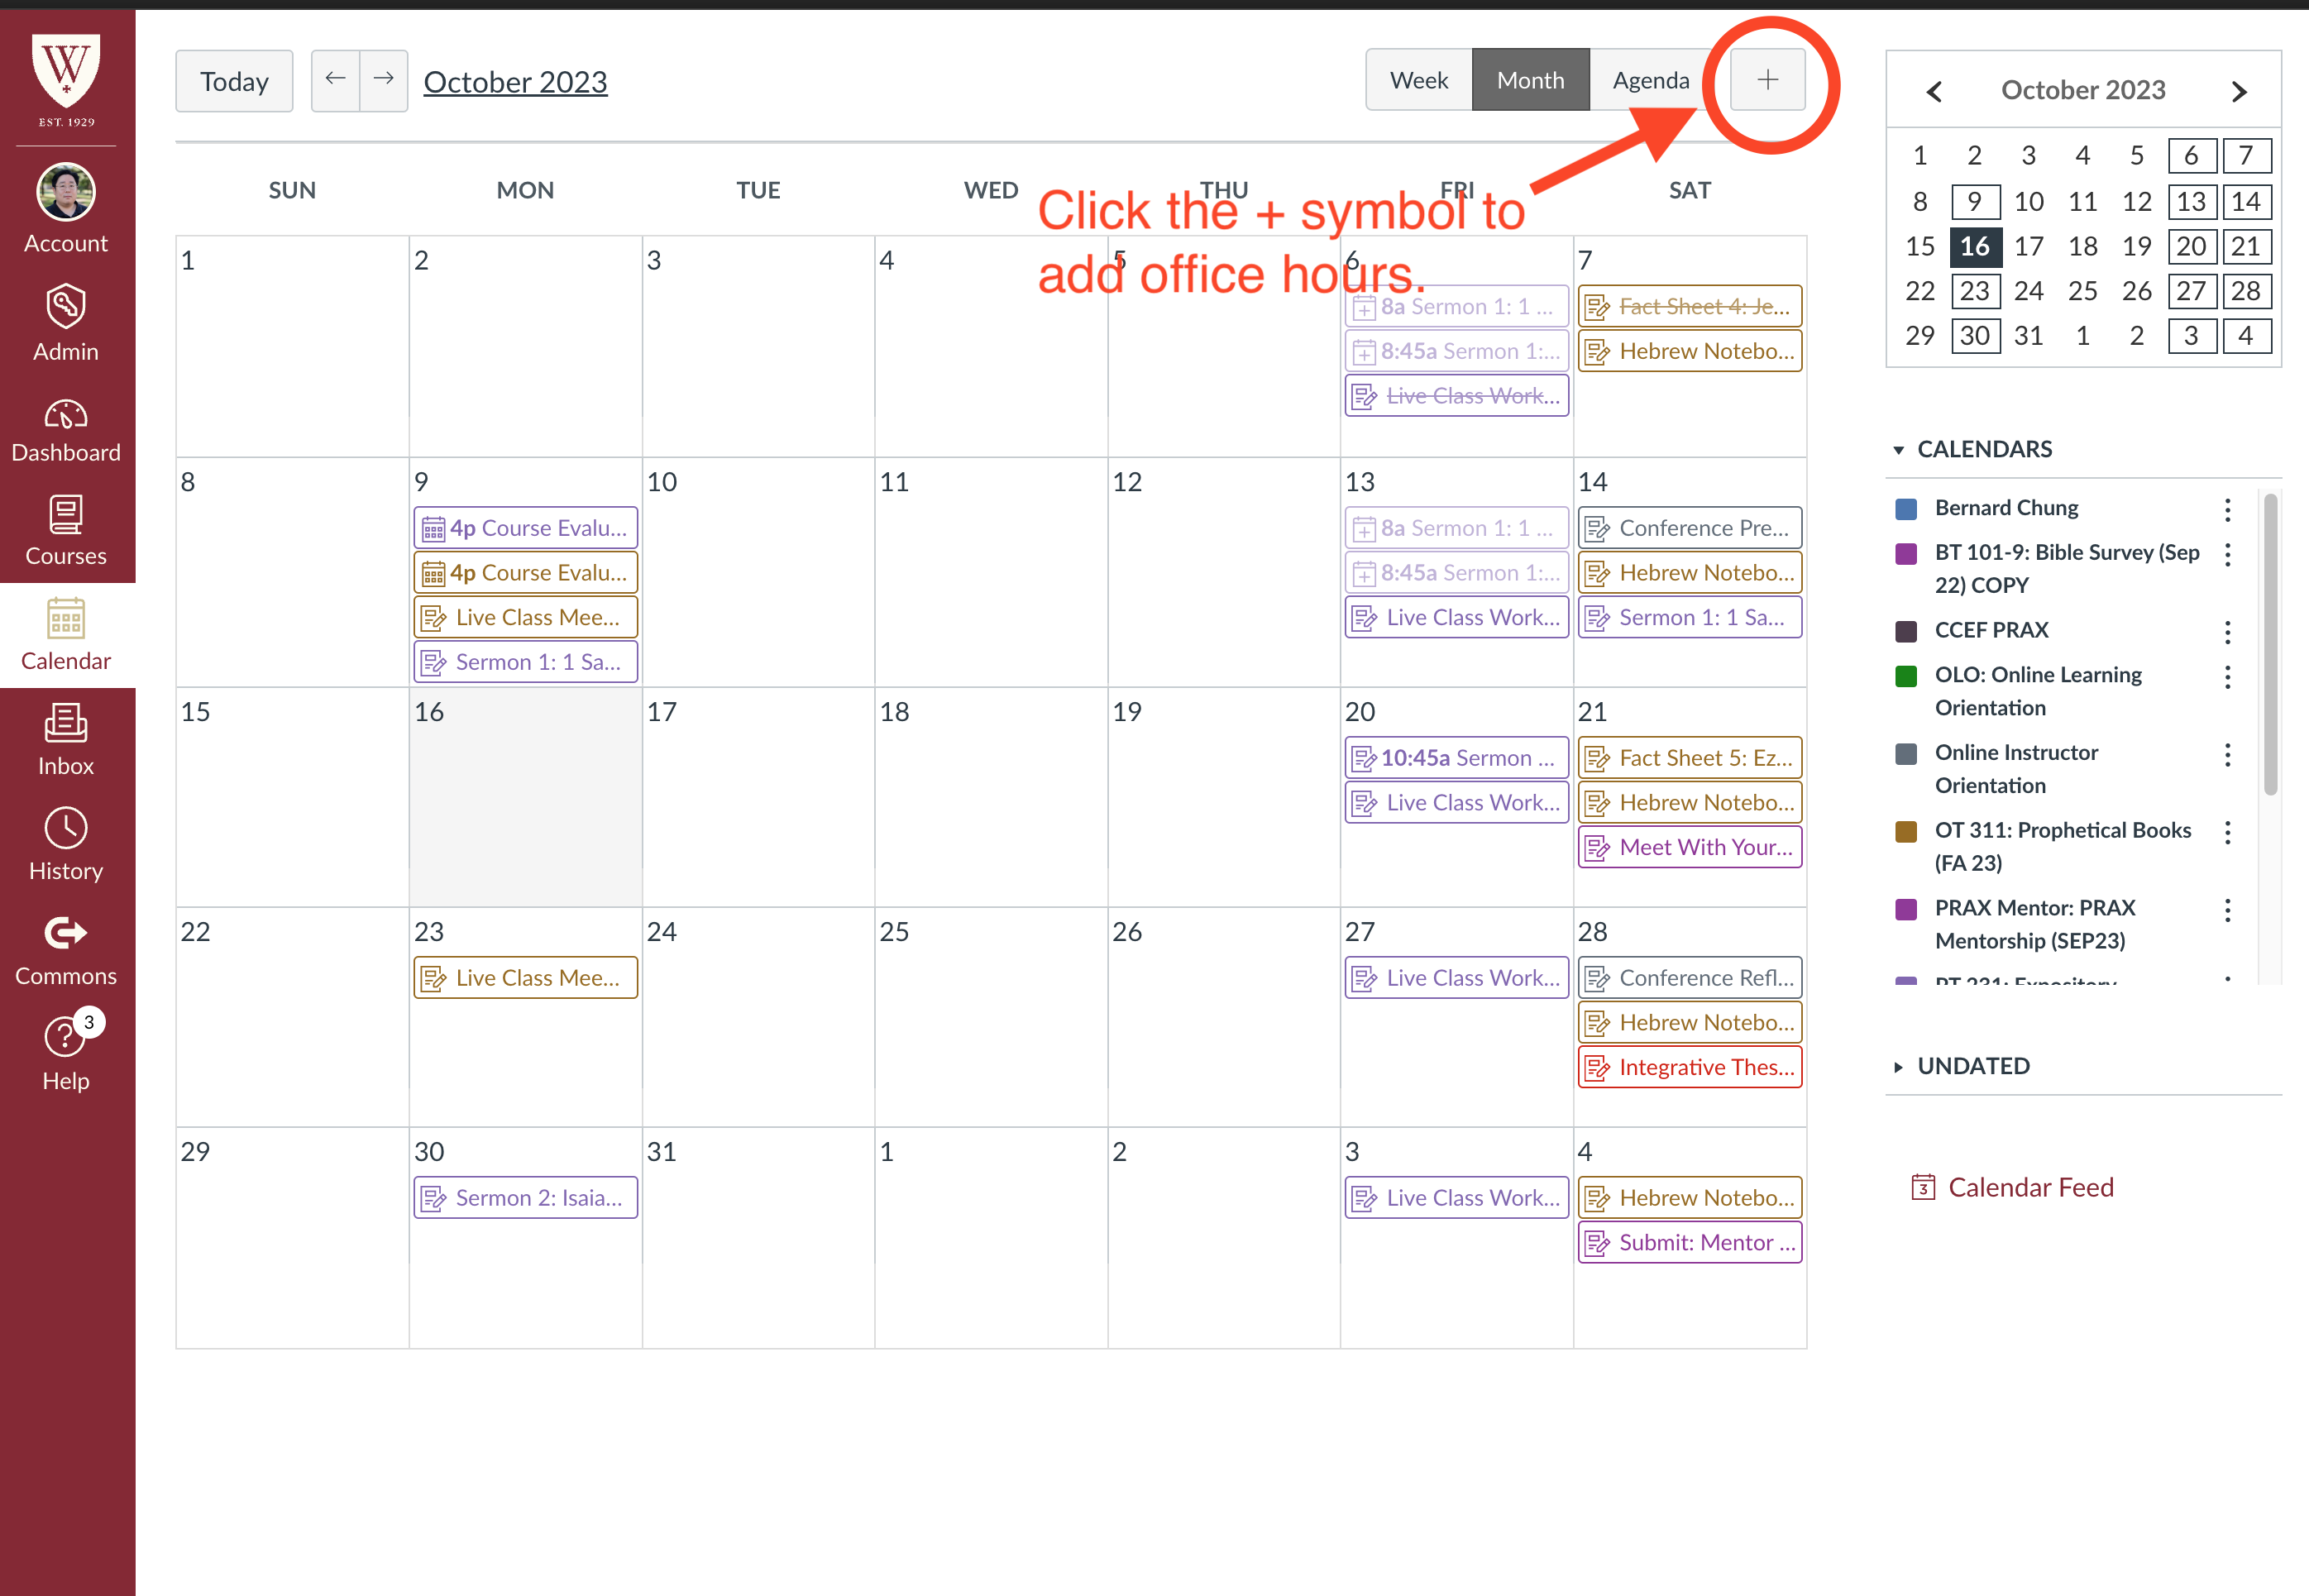
This will bring you to your calendar view. Click on the + symbol in the upper, right side corner to add your office hours.
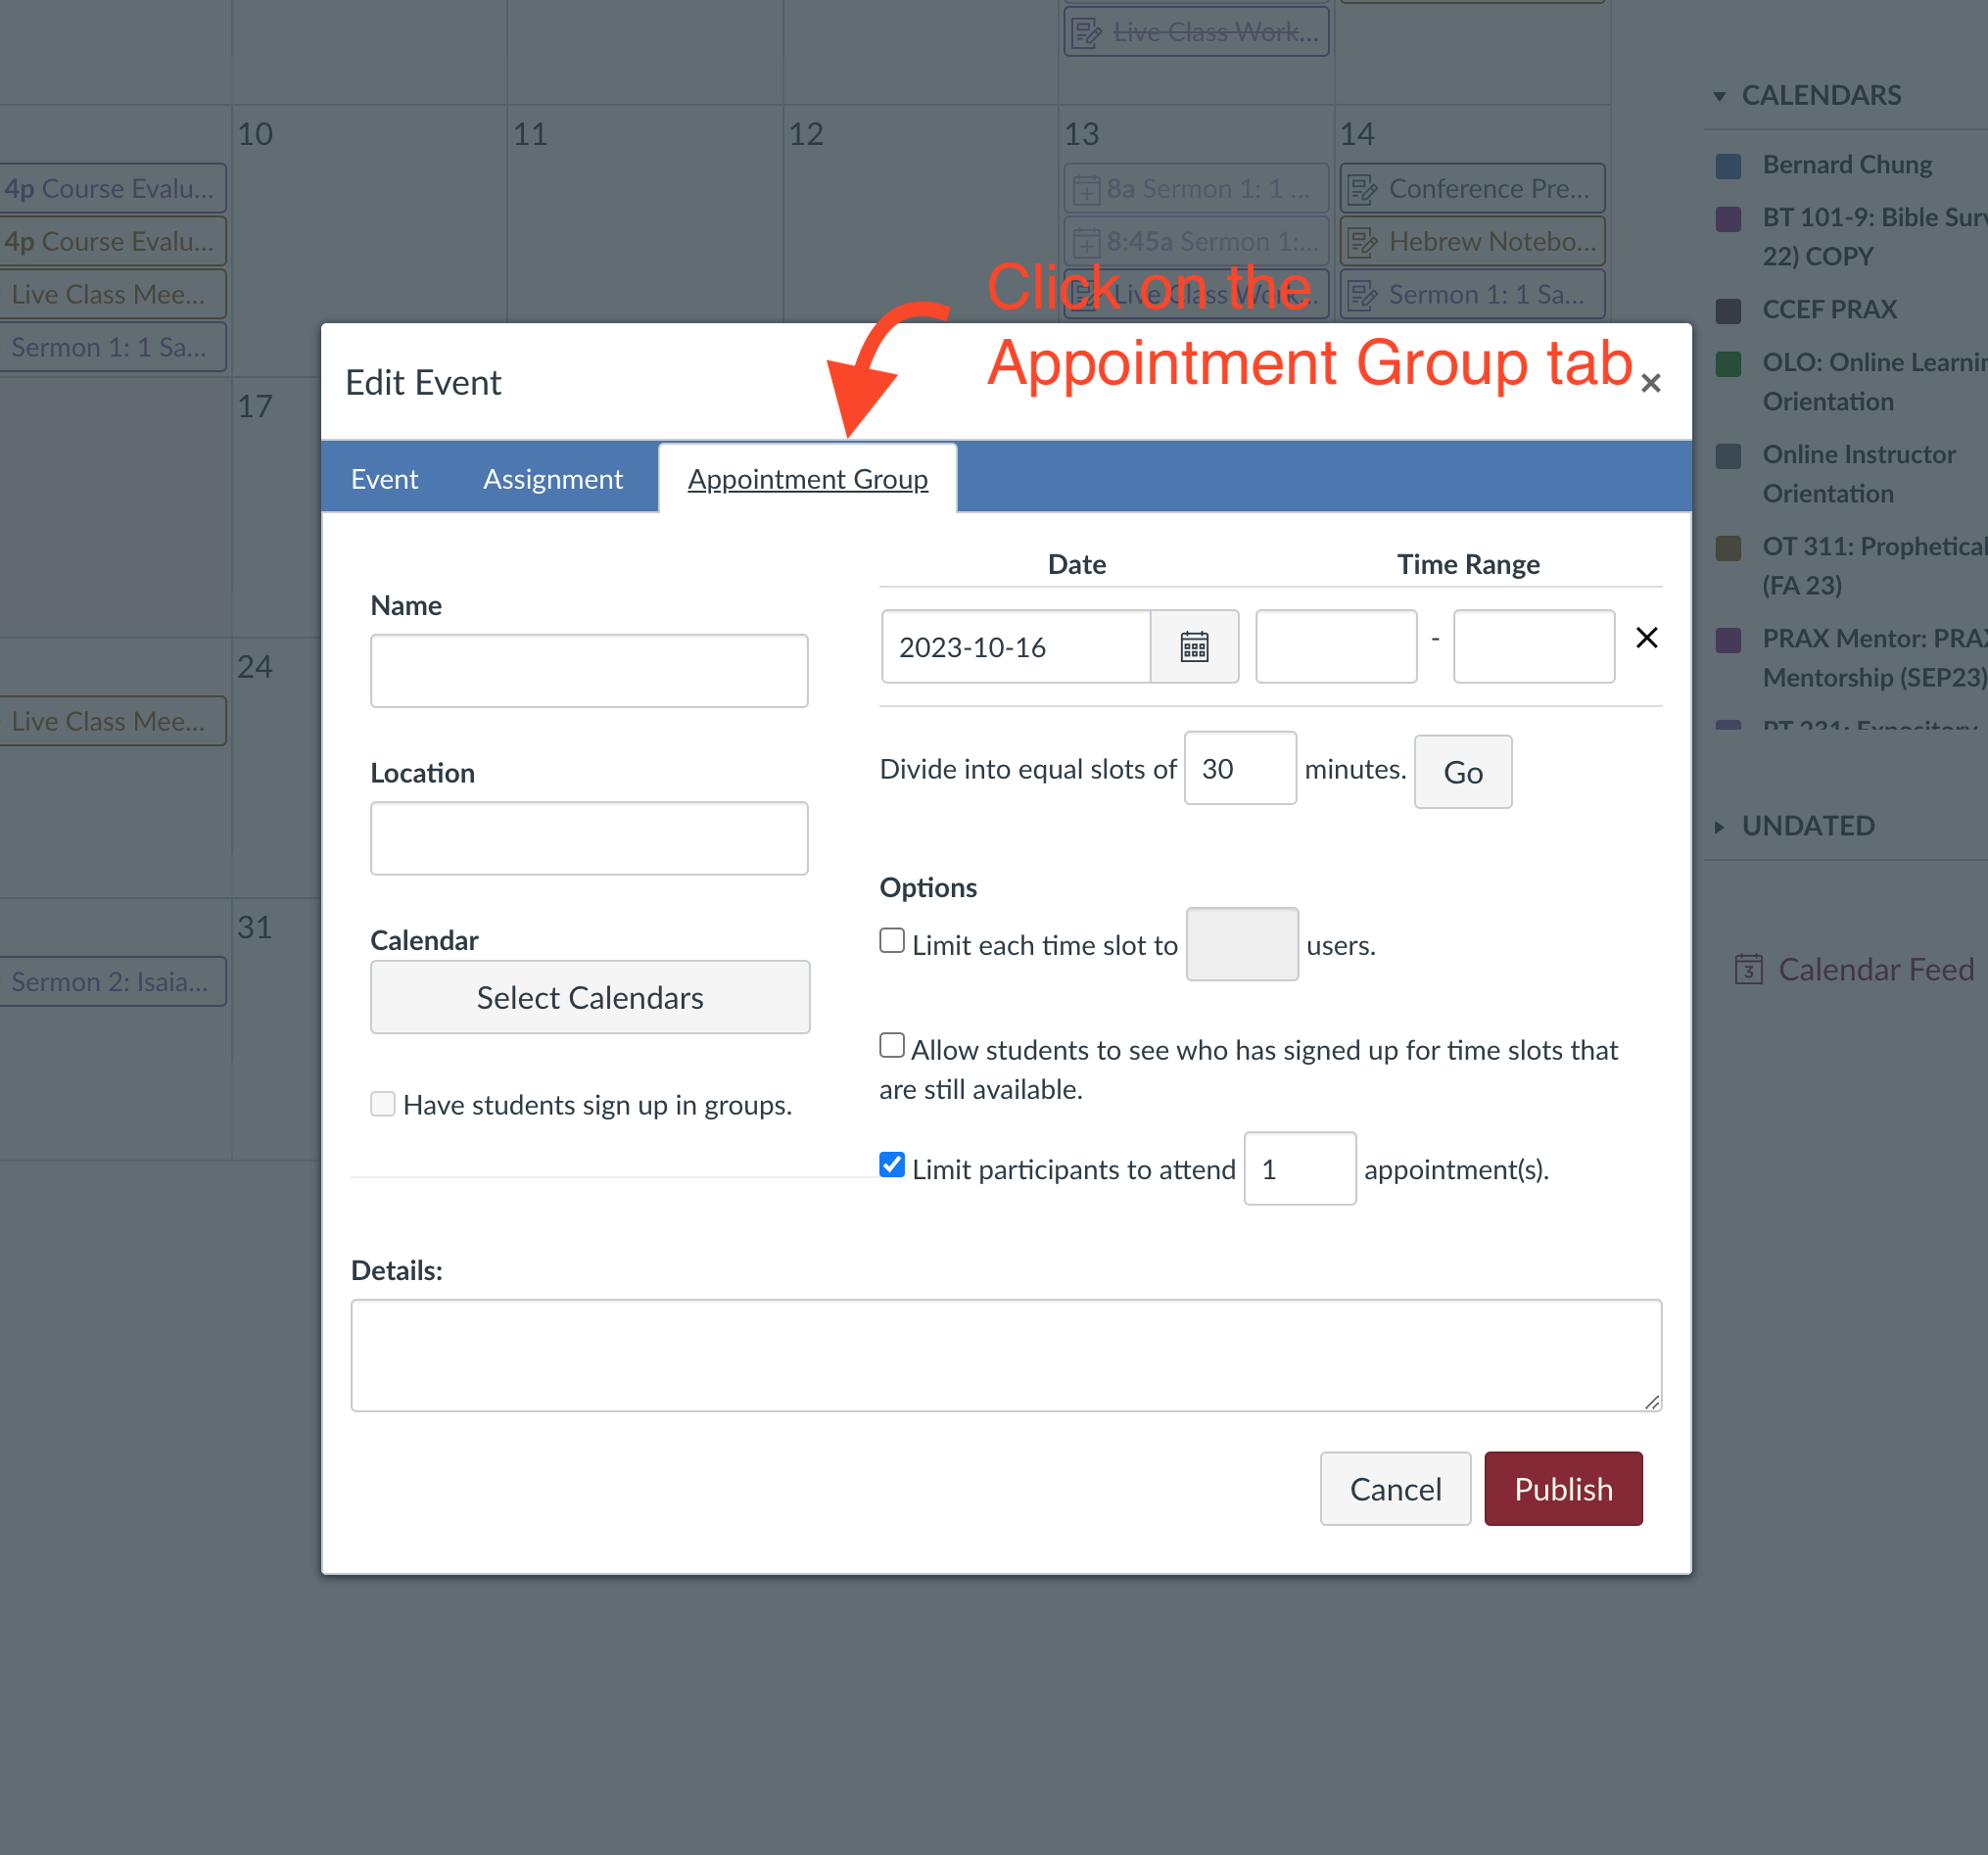
A popup window will appear. Click on the "Appointment Group" tab.
Fill in the Appointment Group Detail:
- Insert your name for the appointment group (usually you will name the appointment group "Office Hours", but you can also put more specific information like "BT 101-1 Office Hours").
- You can insert a personal zoom link in the location or send a link to the student at the time of the appointment (please use "waiting room" or some security feature if you do insert a zoom link). Select
- Select the course for which you are creating this appointment group.
- You can insert special instructions or details in the Details section.
- Limit each time slot to 1 user so students do not sign up at the same time.
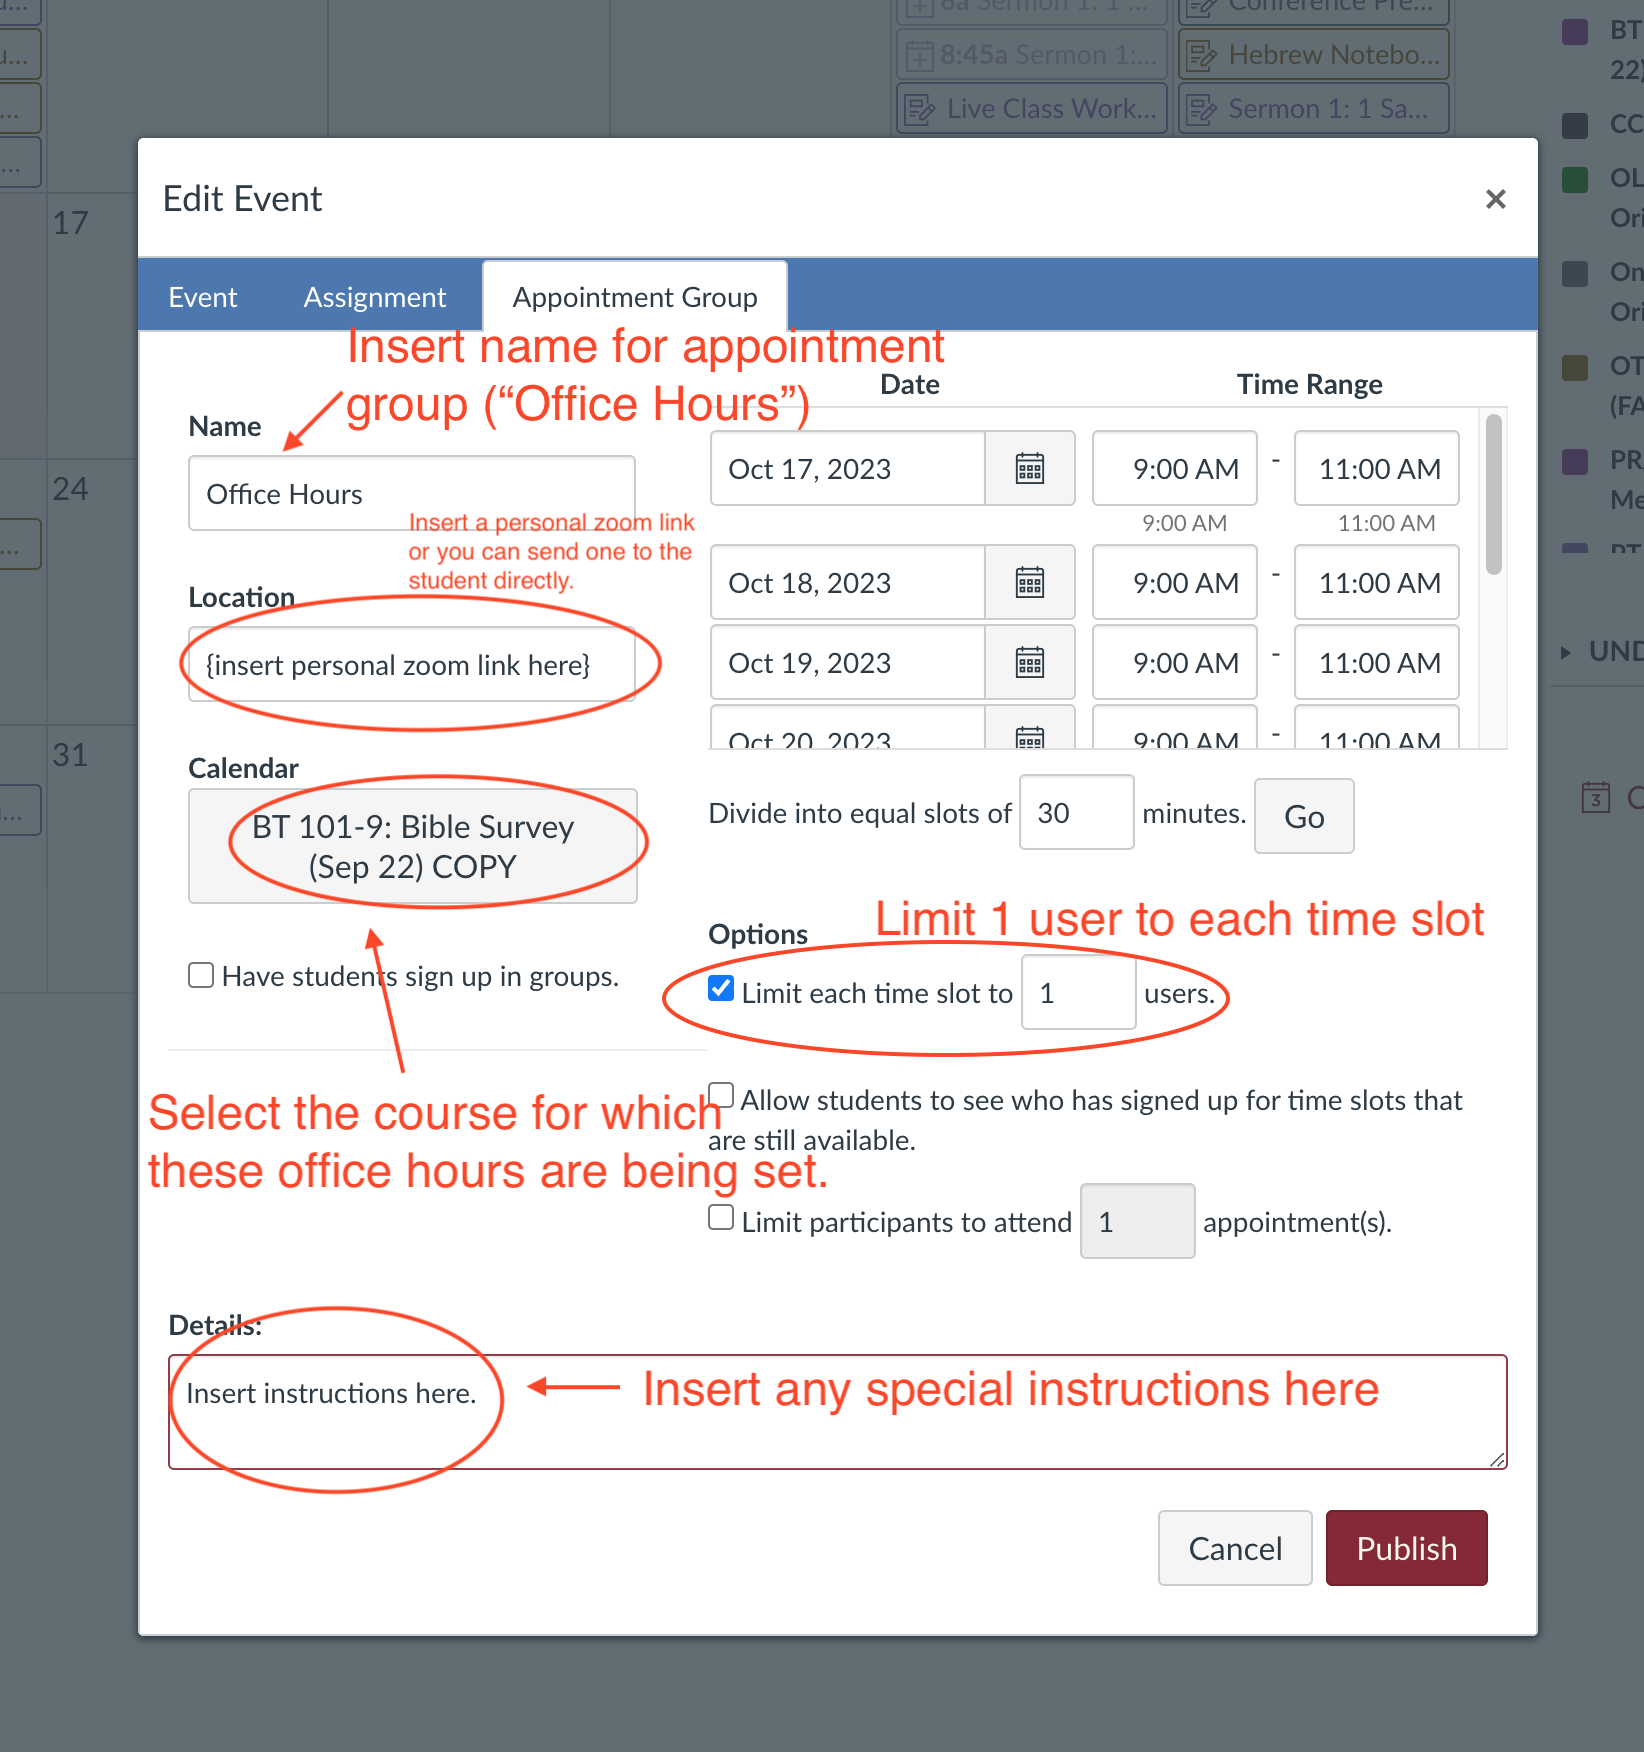
To set the times. Choose the dates of your availability. Set the time range. Then use the divide feature below this window to create equal appointment slots. You must press "Go" for the slots to be created.

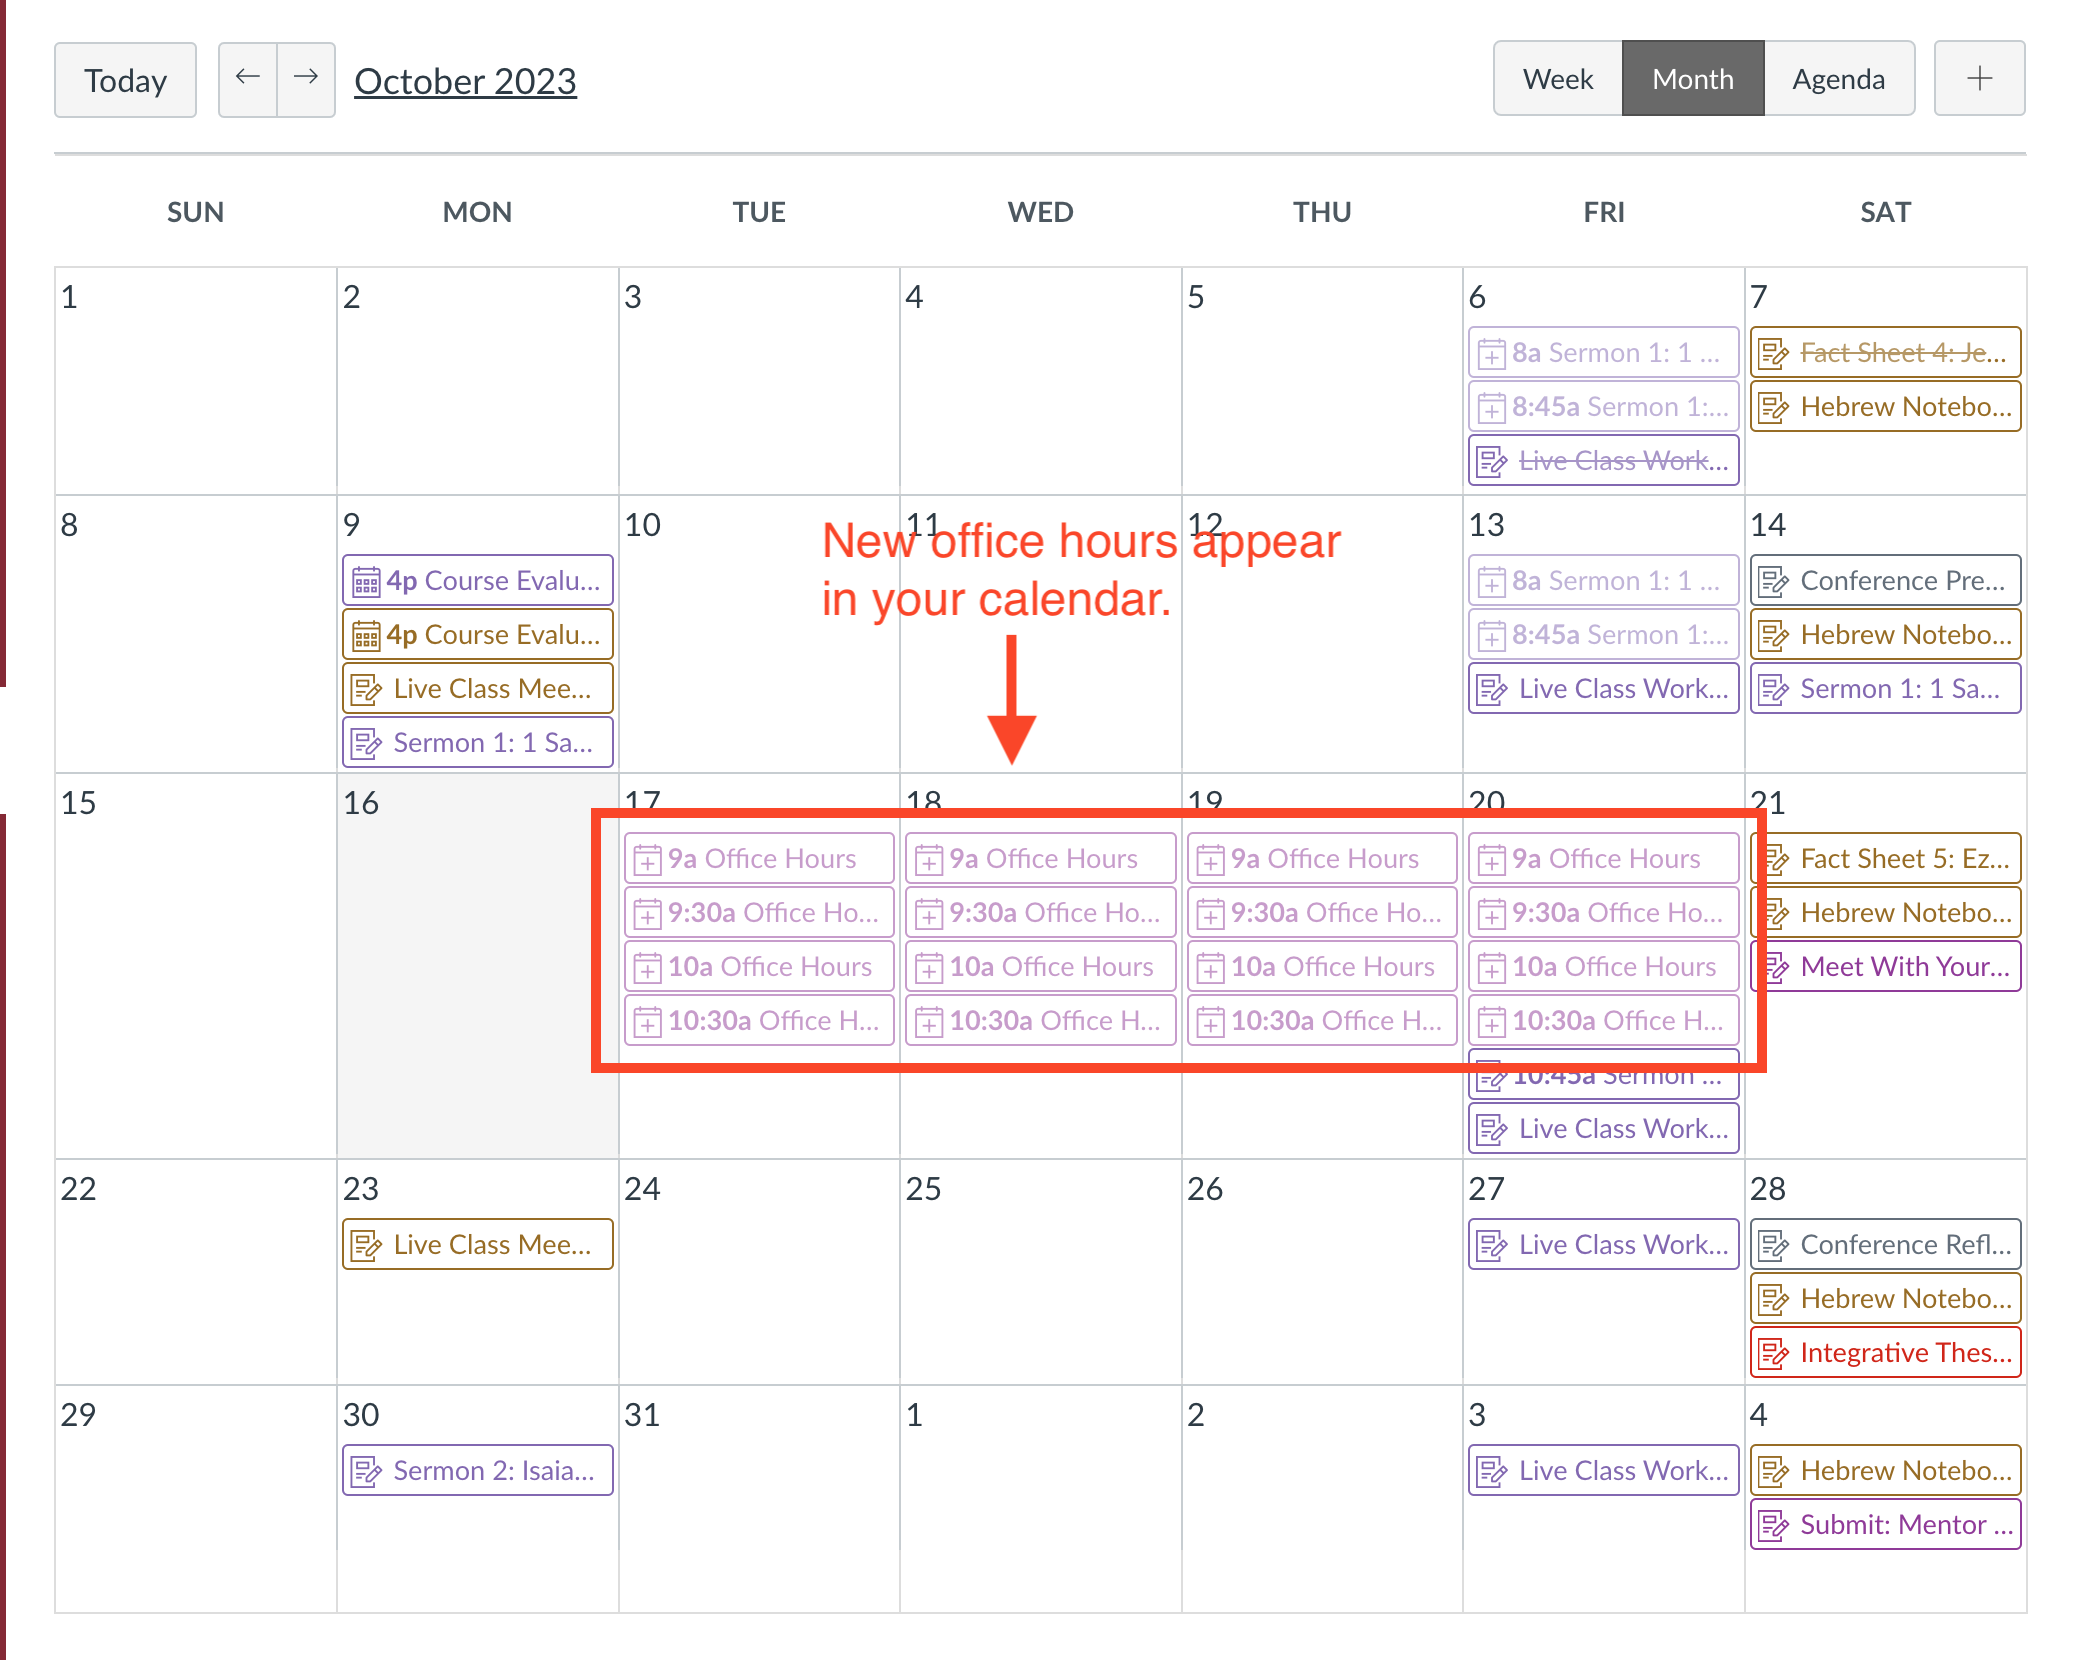
You will return to your calendar view once you click "Publish." The office hour time slots will appear in your calendar.
Students in your course will now be able to search for your office hours using their Calendar page.
Please contact support@wts.edu if you have any questions or if we can be of assistance.