
Register for Courses
Once a registration period opens up, you should see a notice in the notification panel (marked by the bell in the upper right corner) on your Populi dashboard like the one below. Click this notification to get started. You will be directed to your "Registration" tab, where you can view your course options.

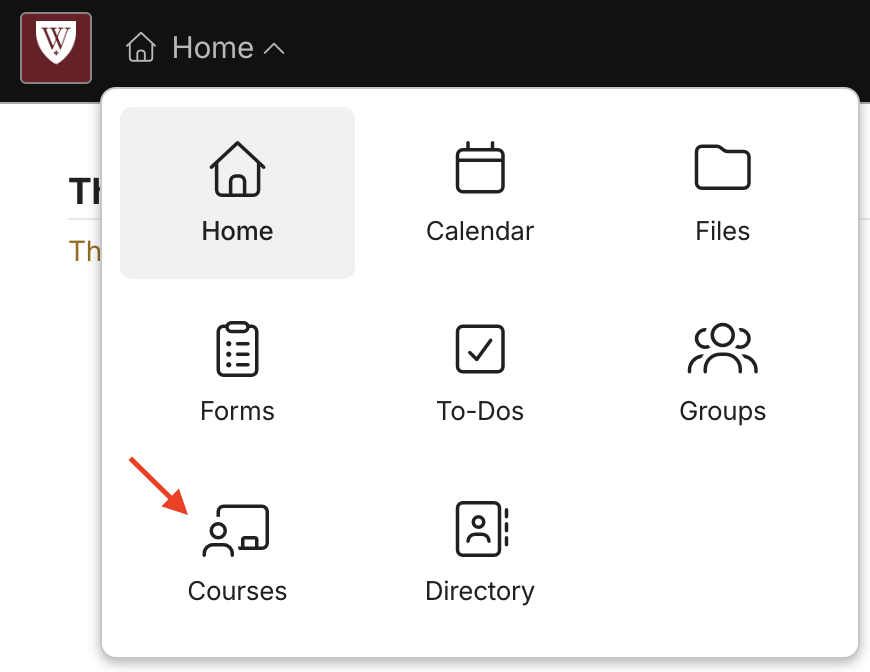
If you don't see the notification, simply navigate to the dropdown menu on the upper left, click "Courses", and the "Registration" tab within it.
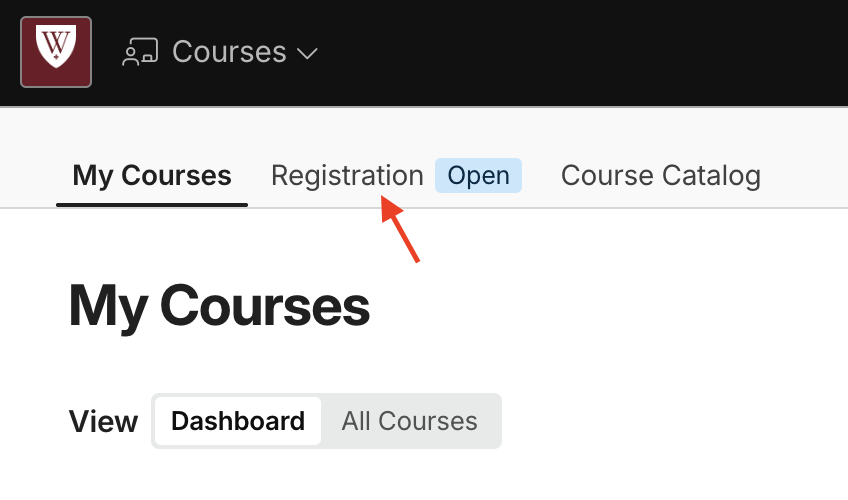
Any course that is available to you will have a green plus sign (+) next to it. Just remember: seats in classes are first-come, first-served!
Once you find the course you'd like to add to your schedule, you can click the green plus sign as shown in the image below to add it.
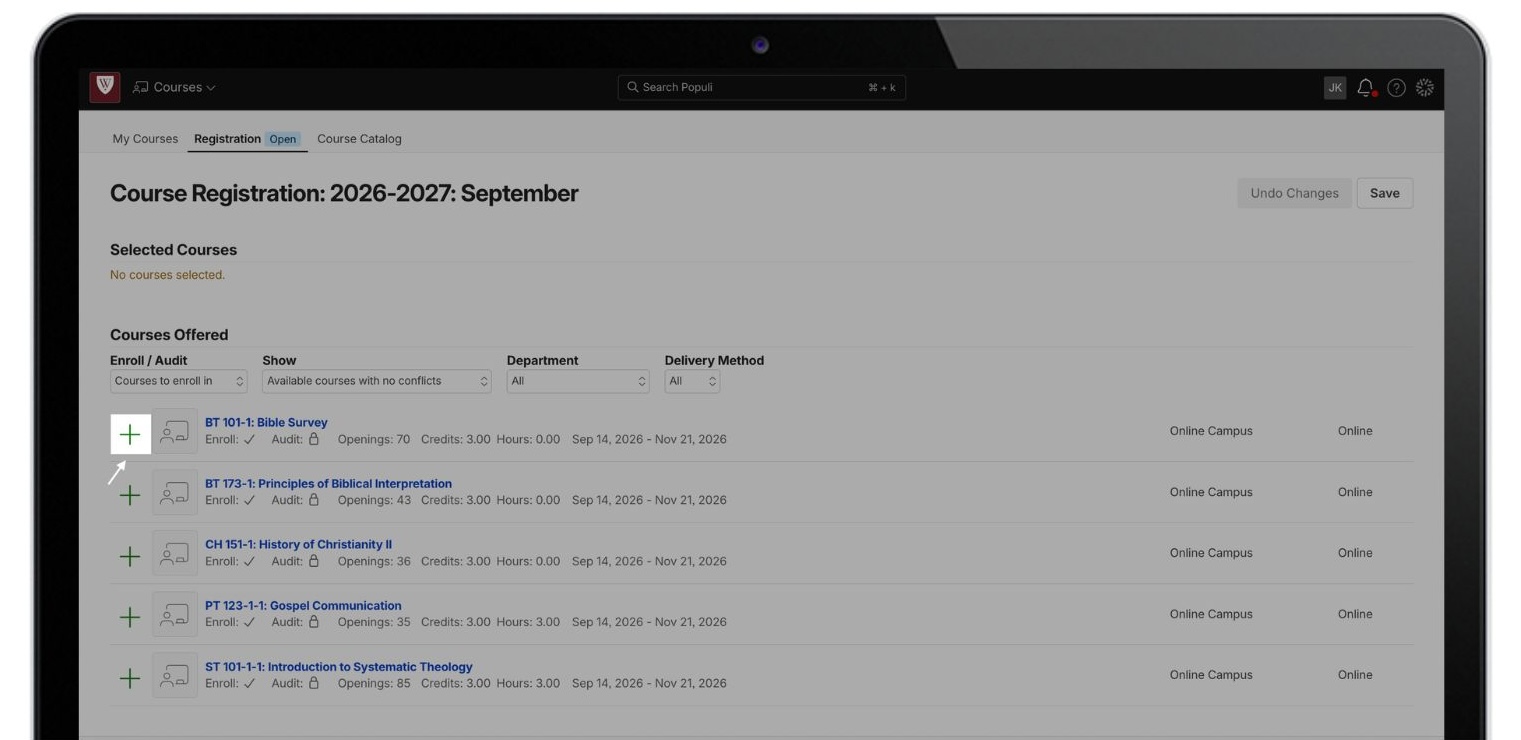
After making your selections, click "Save". Make sure to save your courses before navigating away from this page!

Any courses you've added and saved will be displayed at the top of your “Registration” page as shown below.
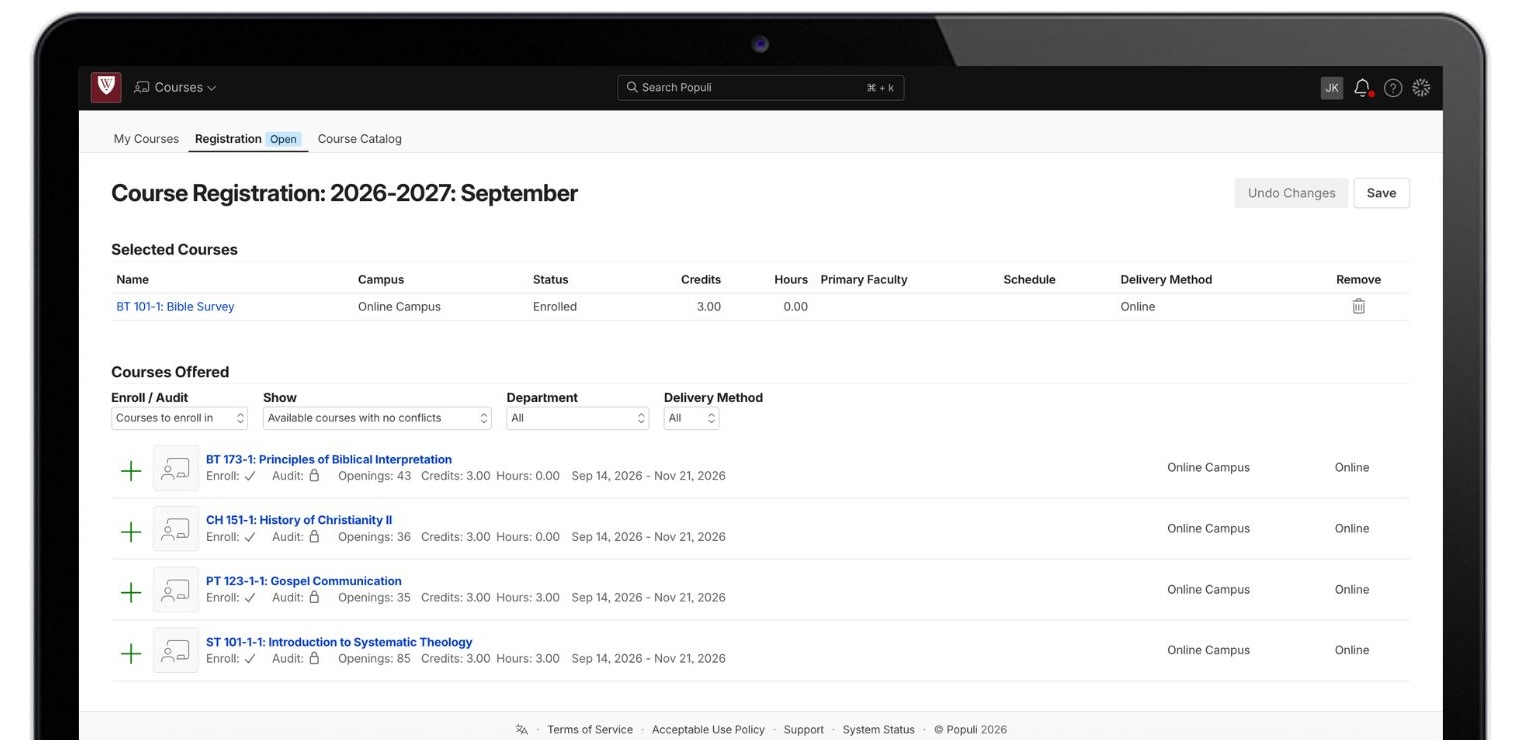
It's that simple! If you would like to drop a course you've already registered for, simply click the trash can icon next to the course. Just remember to save any changes you make.
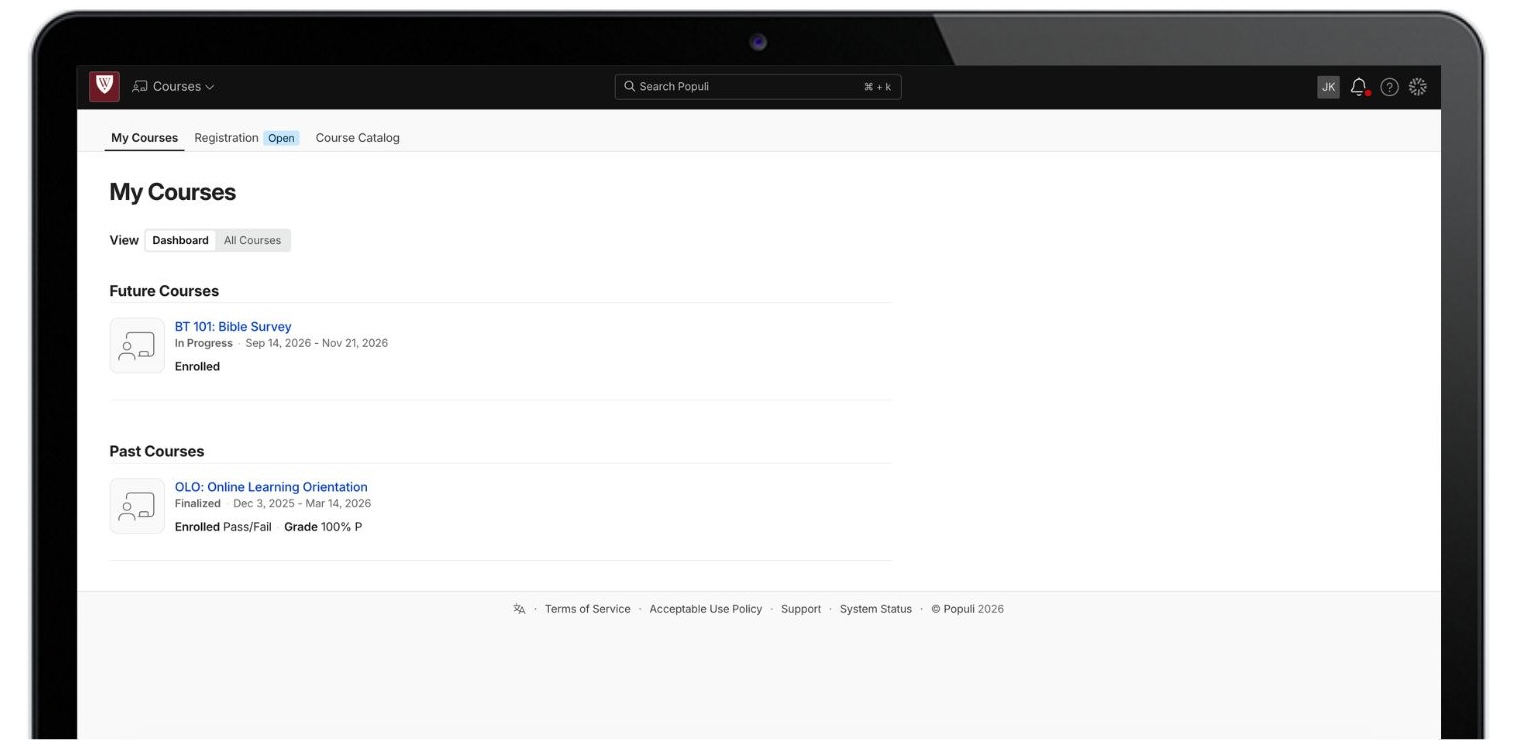
When you're all done, you can navigate back to the My Courses tab, where you'll see your registered courses listed under "Future Courses," as shown below.
If you need help determining what courses to register for, be sure to check out Stellic to plan your degree. For any questions about registering for courses, please schedule a time to chat with someone from our Student Success Team!
Happy registration!